.
{Did you know it's now super easy to pin images from ReMarkable Home?! Just hover over any image on the site and you will see the Pinterest icon show up in the top right hand corner. Just click and PIN ....even if you are on the homepage. The correct link will be pinned}

4.17.2012

PERFECT APPLE PIE {Recipe}

I never quite finished posting my pie recipes.  Here is the apple pie recipe I use.  I love this apple pie.  I do NOT like hard apples in my pie.  I slice mine very thin (like 1/8” or less) and cook it long enough for them to get very soft.  In my opinion, the softer and more jam-like, the better. 

apple pie

Doesn’t it look scrumptious?  Serve it with good vanilla ice cream for the perfect all-American treat!

Classic Apple Pie (based on a recipe by Mrs. Fields)

Yield: 1 pie

Ingredients:

  • 2 pie crusts, unbaked
  • 6-10 large apples, peeled and thinly sliced.  You need enough to fill your pie dish HIGH! I love to use golden delicious apples.
  • 1 c. white sugar
  • 1 tsp. ground cinnamon
  • 1/4 c. cornstarch
  • 1/4 c. salted butter, chilled and cut into small pieces
  • milk and sugar for crust

Directions: Preheat oven to 400. Place bottom crust in 9” pie plate. Mix sugar, cornstarch, and cinnamon in medium bowl. Add apples and toss gently to coat all the apples. Place apples into pie plate and dot with butter pieces. Add top crust. Press crusts together at edge to seal. Trim and flute the edges. Brush top crust with milk, half and half, cream, or a beaten egg. Sprinkle with white sugar. Cut steam slits. ( I actually vent my pie with a fork and THEN I do the milk and sugar.  I think this sort of seals the holes and helps the apples steam inside and makes them softer, which I love)

Place on center rack in oven. Bake for 20 minutes, then reduce heat to 350 and bake another 30 minutes or until filling bubbles in center and crust is nicely browned. Check periodically during bake to make sure crust edge isn’t getting too dark. If it is, cover edge with tin foil and continue baking. When done, remove from oven and cool on wire rack. Serve warm with vanilla ice cream, if desired.


Here is my crust recipe:

Basic Pie Crust

Yield: 2 crusts

Ingredients:

  • 3 c. flour
  • 1/2 c. butter flavored shortening (Crisco), cold!
  • 1/2 c. butter, cold!
  • 3/4 tsp. salt
  • 1 Tbsp. sugar
  • 9-11 tsps. ice water, drizzled one tsp. at a time

Directions: Combine flour, sugar, and salt in bowl. Cut in shortening and butter to make a coarse meal. Sprinkle a tablespoon of the water over the flour mixture. Stir with a fork. Keep adding a tablespoon at a time and stirring in between. Add just enough of the water to form a soft dough. Handle it as little as possible. Divide the dough into 2 balls. Flatten slightly and wrap in plastic. Chill in fridge for 30 minutes. Roll out the crusts on a lightly floured surface to about ¼” thickness and a diameter 2 “ larger than pie plate on each side.

I would love it if you “pinned” this.  Thanks!

4.16.2012

Springs Preserve Pass WINNER!

So, I KNOW you are all sitting at your computers waiting for me to announce the winner of our Springs Preserve Family Pass giveaway!

And the winner is….

True Random Number Service

Random Integer Generator

Here are your random numbers:

15	


Timestamp: 2012-04-17 04:07:44 UTC


Rachelle, that is you!  Congratulations!  Please contact me with your mailing address and I will have the pass sent out to you!  I know you will love the Springs Preserve! 
4.14.2012

CORN & RICE SALAD {Recipe}

corn and rice salad

This is a delicious and healthy recipe.  I have made it different ways, but most recently made it with brown rice and it was delicious!  It is very flavorful.  It’s a great lunch or it could be a side dish with grilled chicken, for example.  It would also be good on tacos. 

Another great idea would be to stuff tomatoes or bell pepper with it for a pretty presentation.  You could even do cherry tomatoes for an appetizer to entertain with.

ENJOY!

Recipe: Corn and Rice Salad/ Stuffed Tomatoes

Yield: 6-8 servings

Ingredients:

  • `3 ears corn, grilled and cut off cob and cooled
  • `1 ½ c. rice, cooked and cooled
  • `2 avocados, diced
  • `1/2 c. diced red onion
  • `2 or 3 sliced green onions
  • `1/2 c. diced bell pepper, any combo of colors you choose (red, yellow, orange or green)
  • `1/4 c. olive oil
  • `3 Tbsps. chopped cilantro
  • `3-4 Tbsps. lemon or lime juice or a combo of both
  • `1/2 tsp. sea salt
  • `1/4 tsp. freshly cracked black pepper
  • `1/2 tsp. ground cumin
  • `6-8 ripe tomatoes for stuffing (or chop a couple to put in the salad)

Directions: Toss all ingredients together in a large bowl.  Chill well.  Enjoy!

I wouldn’t min at all if you “pinned” this!  Thanks:)

4.12.2012

Boutique Sale in Las Vegas

This looks so fun!  Wish I were going to be in town that weekend so I could go.  Just passing along the info to my Las Vegas peeps!
The Polkadot Owl Market is bringing  handmade home boutiques to the Las Vegas area on Friday, April 27th  from 6-10 pm, and on Saturday, April 28, from 9am to 1pm. The event will be at 8325 Shad Bush Ave, Las Vegas, NV 89149 . There will be sixteen local artisans featuring a variety of quality  handmade children's and adult's clothing, home decor, candles, lotions, jewelry, accessories, food, and much more. This is the first of many events to come.
Veronica at Nikycole and Allice at Tutuland met online last year and have been friends since. {No, not on EHarmony!} We have seen other home shows in Southern California and decided to bring this idea to our area.
Follow us on Facebook to get daily updates and sneak peeks from our vendors
We really hope to see many of you at our Home Boutique! It will be a fun event and the perfect time to shop for Mother's Day, Teacher's Appreciation Week, Graduation and 4th of July!
Refreshments will be served plus three of our vendors will be selling yummy food and sweets too.

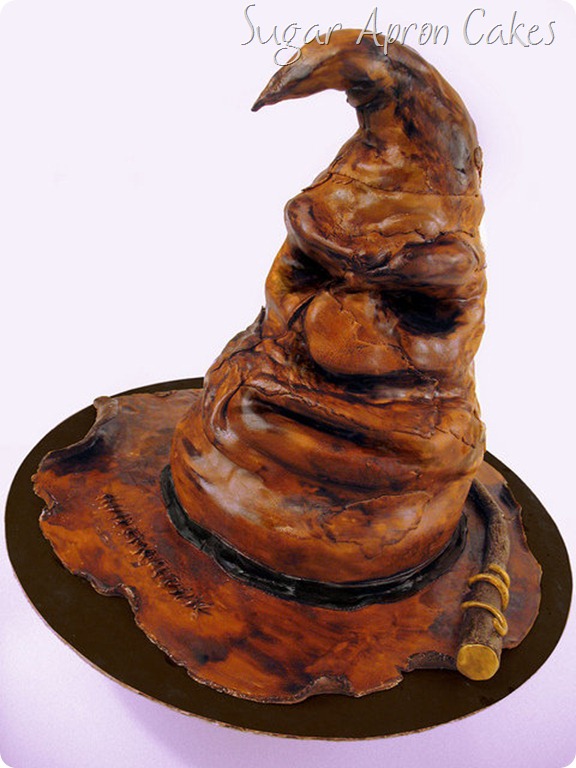
Sugar Apron Cakes

I was contacted by a lady named Cheryl who told me she had made a cake for a shower that was inspired by my Little Man baby shower that I threw last year.  She sent me a picture as well as a picture of an awesome Harry Potter cake she had made.  She is located in Heber, Utah.  If you live there and are in need of a great cake I would recommend checking out her site, Sugar Apron Cakes!

40021_146991625324596_113668088656950_344888_6206847_n-1

image

4.11.2012

SUBWAY ART BIRTHDAY GIFT

My sister had a birthday recently and I wanted to show you what I gave her for a gift.  I have downloaded several different subway arts from various bloggers.  I change them out with the holidays and seasons and they make me really happy. So, I decided to print up a bunch of them on cardstock and give them to my sister with a frame so that she could feel the joy, too.

IMG_7923

Almost all of these came from the blog Eighteen25.  Those girls make the CUTEST subway art and offer it for free for personal use.  My sister seemed to really like the gift.  I also included the SUMMER SUBWAY ART I made last summer, which I will email to anyone who becomes a follower of my blog (blog or Facebook follower).  I think I will give this same gift to some of my other sisters.

My House, continued- The Master Bedroom

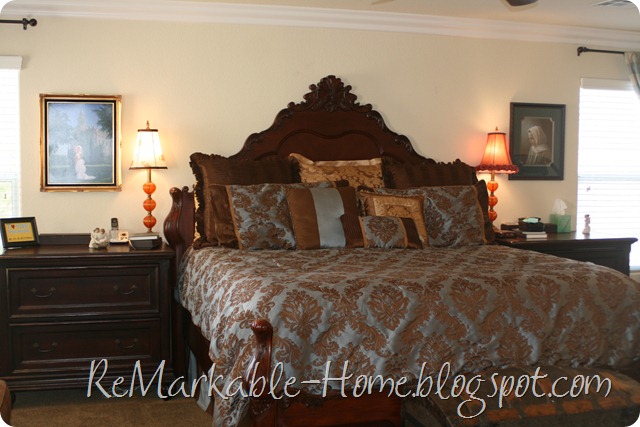
I love my bedroom.  It is huge.  I’ve never really gotten around to decorating it.  But I like my furniture.  My parents bought us this bed when we got married as a wedding gift.  I liked the antique look of it.  I would probably choose something different now, but I still do like it.  It is a BIG bed and it is HIGH.  You kinda needs steps to get on it.  So, we needed BIG bedside tables to go with it.  These ones are file cabinets with leather tops.

I need some new lamp shades.  I got these lamps for a great price at Hobby Lobby years ago.  But they didn’t have two with matching shades.  My bedding came from Target.  It was on clearance for like $40 or something.  I had to buy the sham in the middle and the gold pillow separately.  I think they cost about $40 together from Dillard’s or somewhere.  I don’t know why king bed sets only come with two Euro shams.  That’s not enough in my opinion.

Sorry, the color on this picture isn’t great.  The steamer trunk at the end of the bed is an antique my mom bought me for a hope chest.  I refinished it inside and out for my Young Women in Excellence project.  It will be with me till I die, I am sure.

IMG_7956

IMG_7957

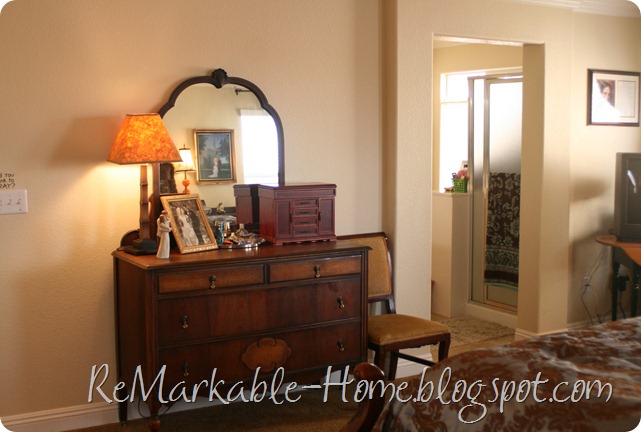
This antique dresser was my dresser from childhood.  I love it so much.  I am so grateful my mom let me keep it when I grew up.  Thanks, Mom!

IMG_7959

This little table in the corner with the TV was made by my great grandfather.  My mom had it in her house for years with a thick coat of turquoise paint on it.  Not sure who painted it that way but I know it wasn’t my mom.  Back when I had my first son and I was living with my parents I refinished it to match the room I had as my living area.  Forest green was big back then so I painted the legs that color.  I need to repaint it now but that is way down on my priority list.  But I love having a table that was made by one of my ancestors.

IMG_7960

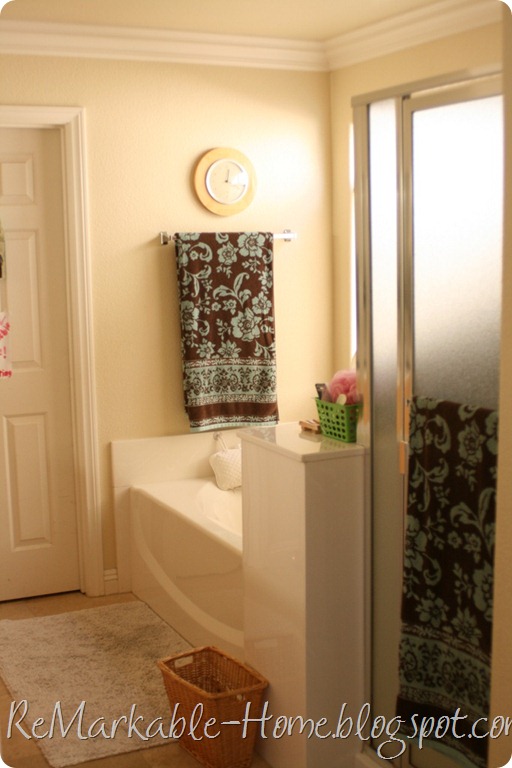
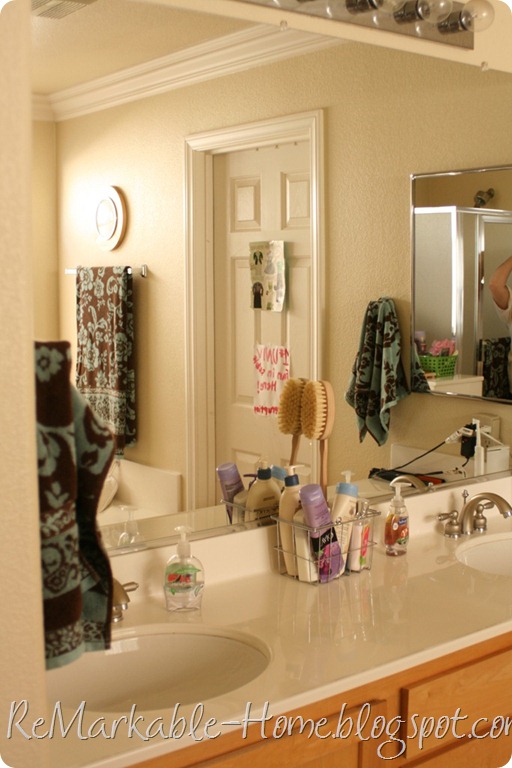
And here is my bathroom.  Nothing special.  I chose cream paint in here way back when so I wouldn’t get any sickly reflections on my skin.  It is a nice bright bathroom with natural light, which I like.

IMG_7961IMG_7962

That’s my room.  You can’t see it but there is an elliptical machine on the other wall that I use to hang clothes on:)

Here is my closet/my husband’s office.  He used to have his office in the room downstairs.  Then he had a job where he didn’t work at home and we needed that room for a bedroom, so we moved his stuff to our closet, which is almost as big as the kids bedroom and has a non-functioning window.  Well, a couple years ago he got a job where he needed to work at home again.  So, the poor guy works all day in our closet.  I know he is looking forward to having an office where he doesn’t have to look at clothes and all our crap again.  He is a good sport.

IMG_7982

Well, that is the end of this tour of my home….until I get some pictures taken of the last bedroom.  I hope you enjoyed seeing it.  I have a degree in interior architecture and design, and yet my home is FAR from perfect.  But how your home is decorated is far less important than the love it contains and the family it holds.

4.10.2012

My House, continued- The Boys’ Bedrooms

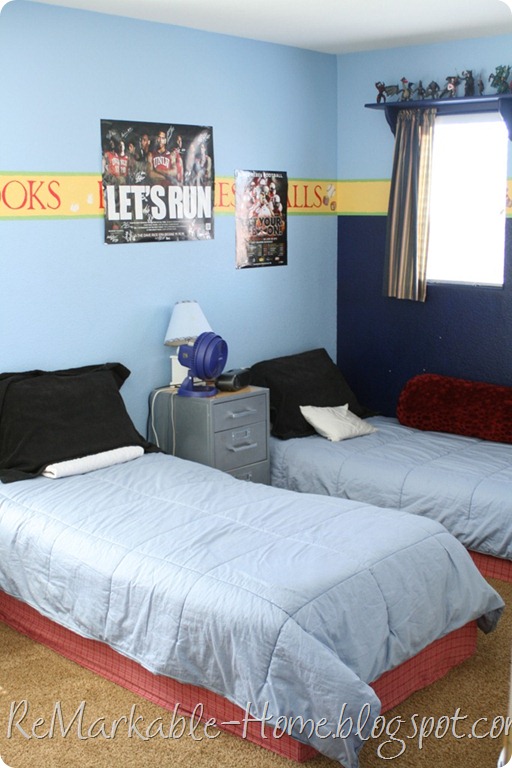
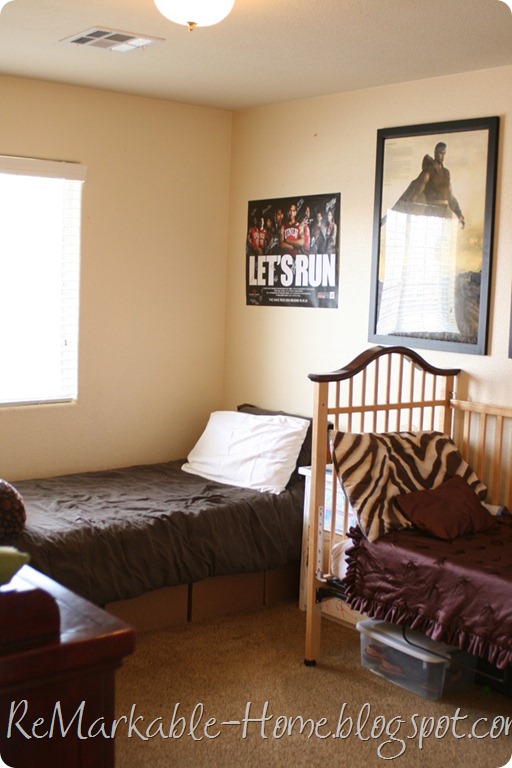
Don’t laugh.  My kids bedrooms are not cute.  At one point they were.  I loved my nursery.  I decorated it just after we moved in while I was pregnant with my second son.  He is now almost 10!  And the other bedroom used to be cute too.  We decorated it in a African theme for my oldest son on Christmas eve.  He was at his dad’s house that night so we could do it and surprise him on Christmas morning.  I was sooooo tired that night!  My parents came to help.  We painted and I had made duvet covers with animal print faux fur.  But that was many years ago.  Now, they are just a place for kids to sleep and keep their stuff.  We have had two kids in these rooms for a long time.  And they are small bedrooms.  It is cramped, to say the least.  But, here they are so you can see. 

Don’t you love the basketball posters over the baby border?  My 8 year old is in here now and my 17 year old stays in here when he is over.  The shelves above the windows used to hold a teddy bear collection.  I had cute crib bedding in these colors with teddy bears in clothes on it. 

And don’t you love the beds?  They are made out of boxes of food storage.  Remember, I am one of those crazy Mormons!

IMG_7974

My kids have tried to rip off some of the little wallpaper decorations between the words in the border.  It looks great!

IMG_7975

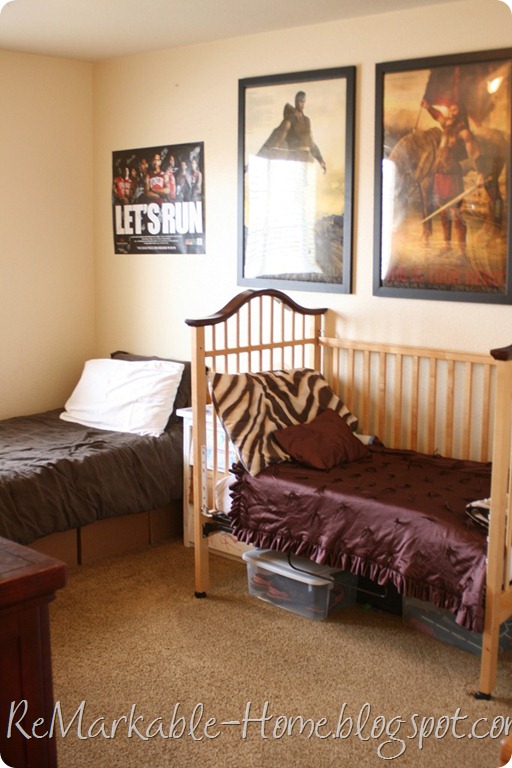
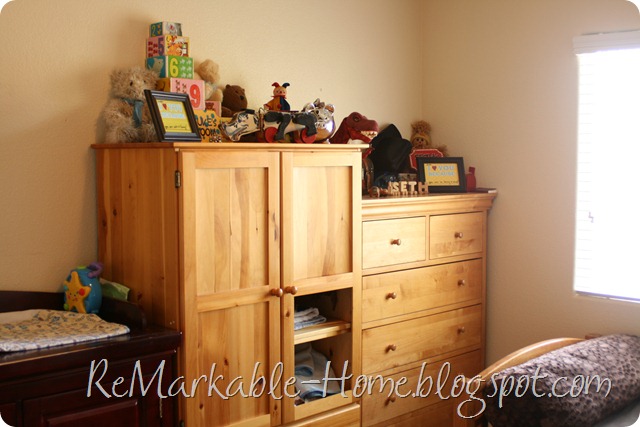
Here is the other room.  We did repaint it a few years ago to this cream color.  The bed isn’t made from food storage, but it has a lot of it underneath.  And that is my crib with the side taken off for a toddler bed.  My youngest could sleep in a big bed but there is hardly enough room in here for one.  So he will stay in this bed until we move.

IMG_7976IMG_7977

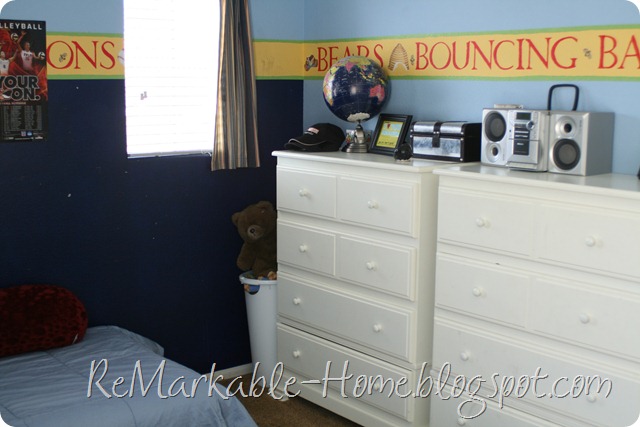
Here you see one dresser in the corner.  Then we have this armoire that I got for a closet for my first son 17 1/2 years ago.  We had to put it together ourselves and then finish it.  One of my kids (not sure who) broke out that bottom panel.  I still use it as a closet for my youngest.  It works well.  Next to it is the changing table.  I can NOT wait until I no longer need a changing table!  I don’t think I will feel sad about giving up diapers forever!

IMG_7978

I would love to be able to decorate my kids rooms cute again.  But with these rooms being so crowded and funds being tight it just hasn’t seemed worth it.  Besides, once your kids get to a certain age (boys especially) they aren’t too keen on you dictating how their room should look.  They seem to enjoy hanging “ugly” posters on the walls and ruining the look you’re trying to create.  What I wouldn’t give for a girl who wanted her room done up in “my style”!

4.09.2012

My House, continued- The Boys’ Bathroom and Laundry

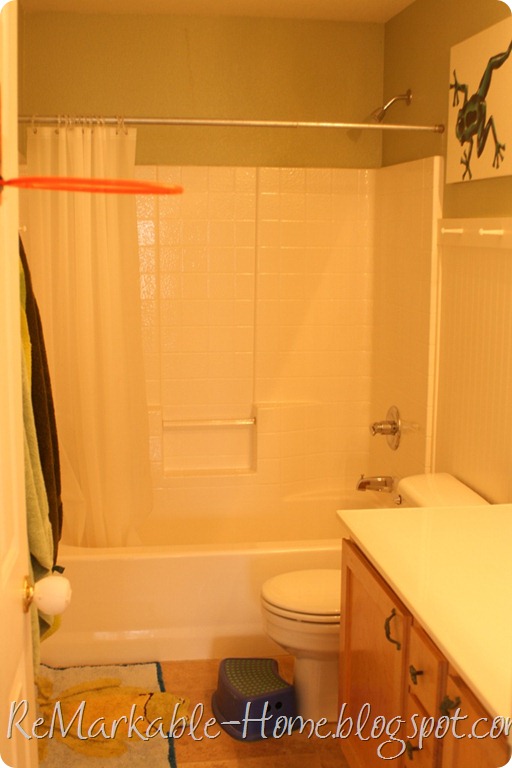
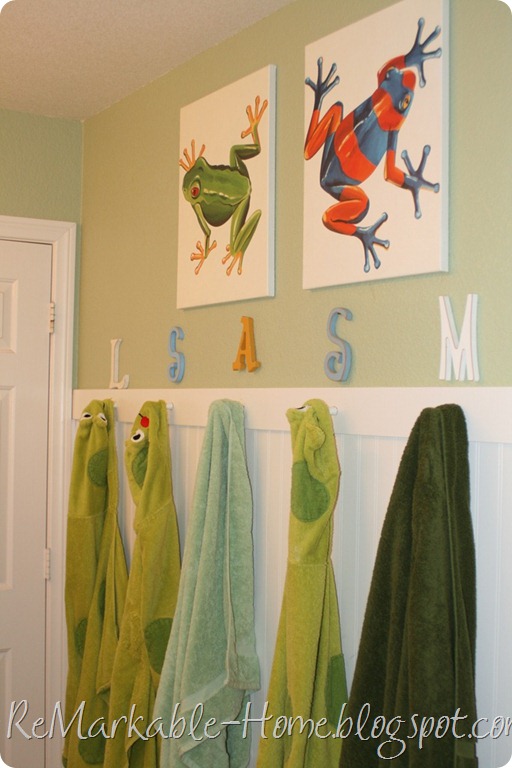
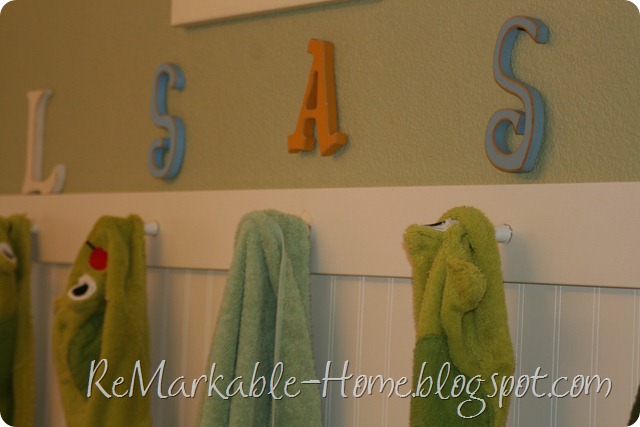
This is my boys’ bathroom.  Its nothing spectacular.  We added bead board and pegs to the walls to give it some architectural interest.  Unfortunately, the pegs are too high for little boys and some of them have been pulled loose by kids tugging on their towels to get them down.

I used to have a cute shower curtain, but it got ruined.  I bought a white fabric one on clearance recently that I’ve been meaning to do something cute to but I haven’t been able to figure out what to do.  Anyway, it works for showering and brushing teeth!  I am REALLY looking forward to having more bathrooms though as there is MUCH fighting over this one.  YES, boys fight over bathrooms, too.

IMG_7979

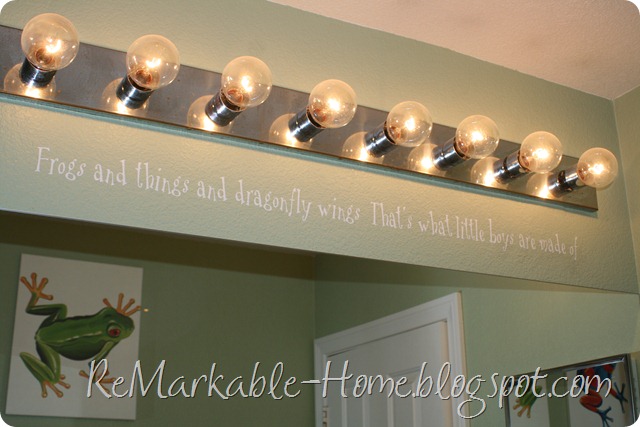
I made the artwork by putting wallpaper frogs on canvases and coating with a clear coat.  I think they are cute.

IMG_7987

I don’t know why this A is hanging so high.  Someone must have knocked it off and then hung it back up wrong.IMG_7988

This house is AMAZING when it comes to the electrical.  The lights in this bathroom and the master have not burnt out in 11 years!  Can you even believe that??IMG_7989

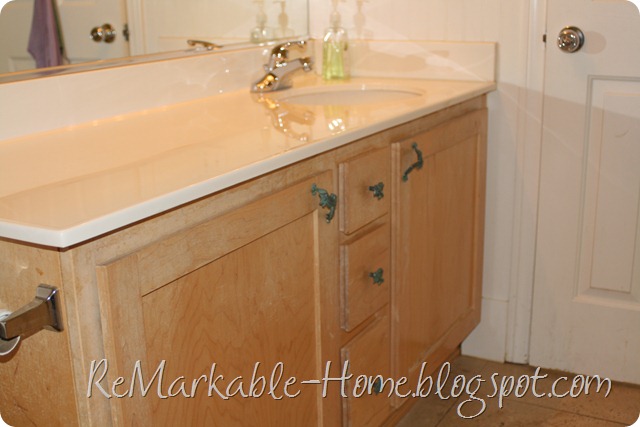
These cabinets need a new coat of polyurethane.  They’ve had water dripped down the front a few too many times.IMG_7990

Here is our laundry room.  Nothing special.  Not decorated.  But I LOVE that it is upstairs.  I will miss that so much! And yes, I have a lot of crap!

IMG_7980

4.07.2012

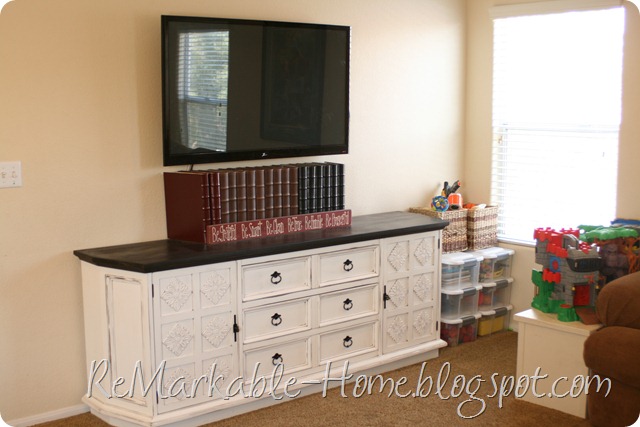
BUFFET RE-DO {Furniture Refinishing}

IMG_7967

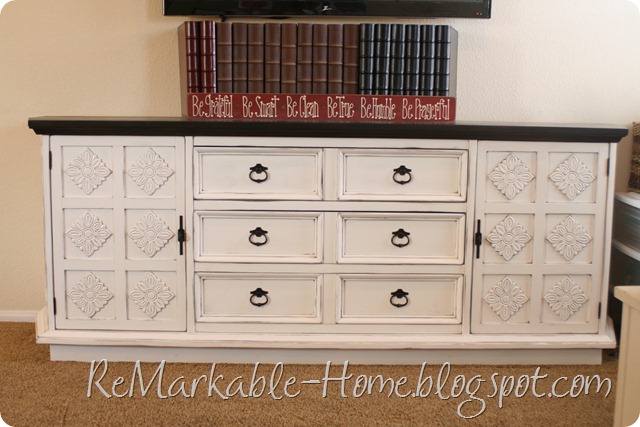
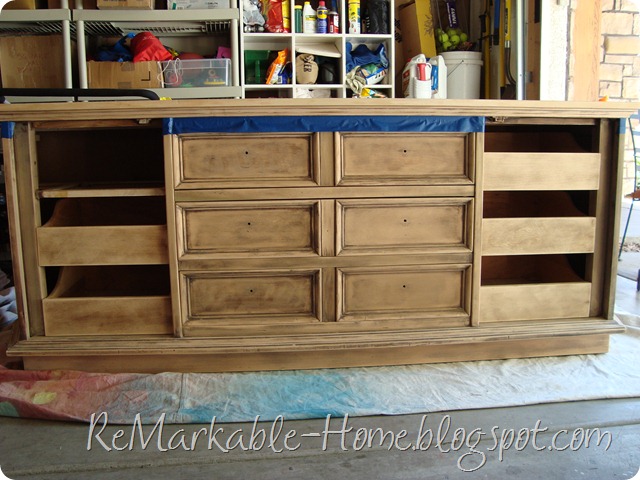
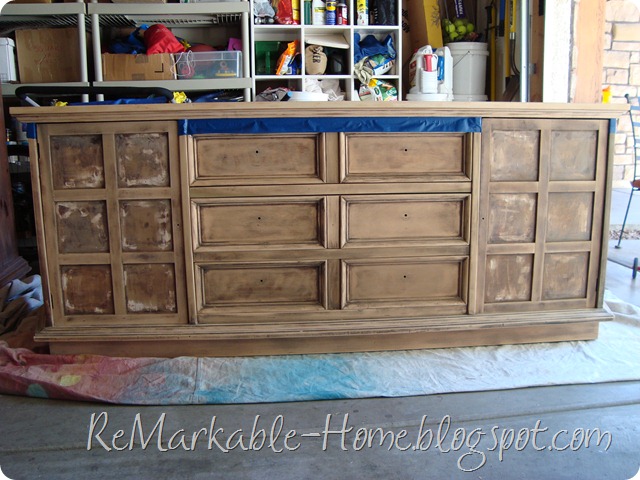
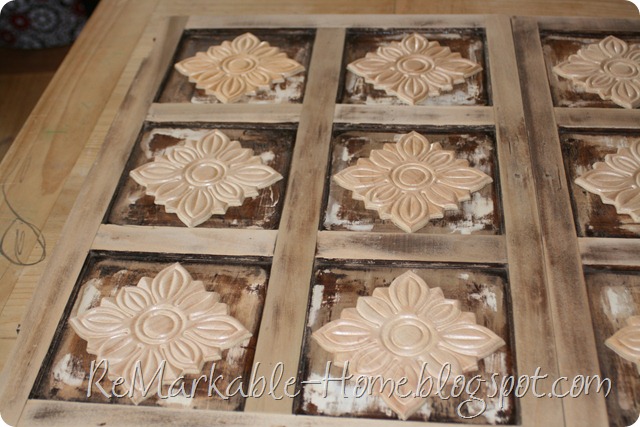
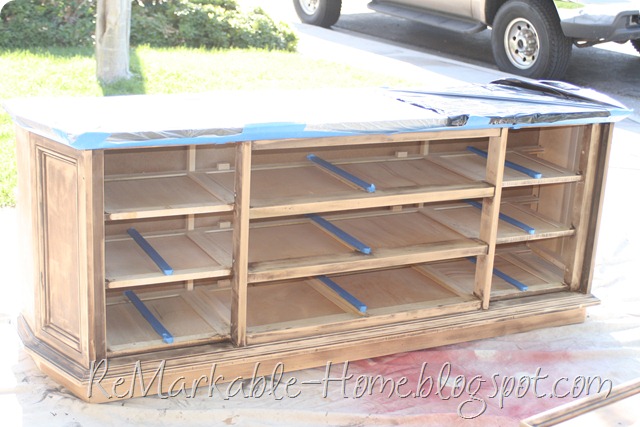
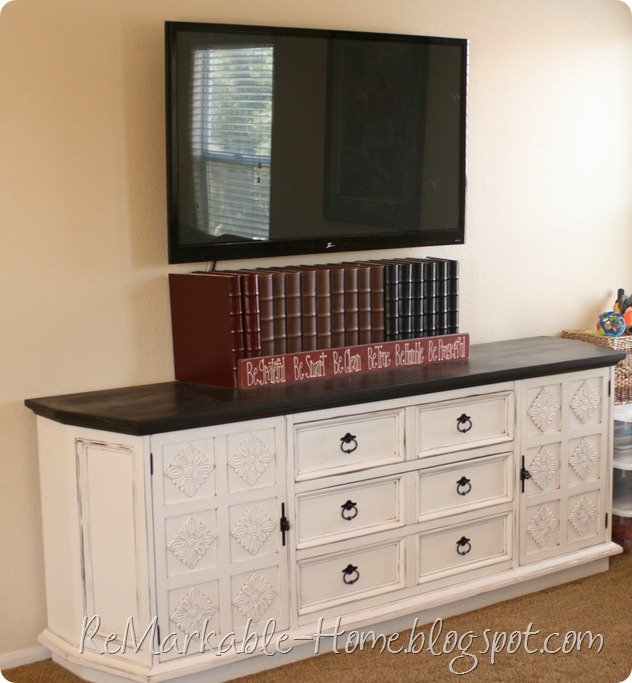
So, I wanted to show you my buffet that I refinished.  One Sunday morning we were driving to church and we saw this hug old buffet someone had put out for the trash.  We didn’t have time to stop as we were already late.  I figured it would be gone when we got back, but it was still there.  My husband and I talked about getting it, but we had no where to put it so we left it.  I was feeling bad all day thinking about that piece of furniture getting thrown in the trash.  So, the next morning we went to see if it was still there and it WAS!  It was HEAVY but somehow I summoned up some strength and helped my husband get it into the truck.  We took it home, moved it into the garage and it sat there for MONTHS!  But eventually I decided I wanted to use it up in our loft and got my butt in gear to get it refinished. Actually, my husband sanded it down one day and I removed the ugly rose glass tiles from the door fronts.  Then we put it back in the garage where it sat for months.

Here is a before picture of it.  Unfortunately I forgot to take a picture before I did anything so you can’t see the ugly glass tiles. 

237

There was one drawer missing inside which worked out perfectly.  My husband removed the track and we now use it as a shelf for the electronics.

238240

Here are some more pictures of the process.  It was a big project with many steps.  If you have any questions about what I did feel free to ask.

IMG_7277IMG_7278

I stained the top and then covered it so I could paint the bottom.

IMG_7280

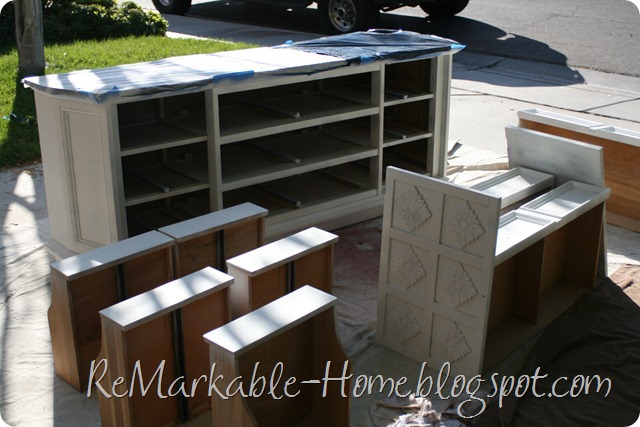
I used a primer in spray cans.  Can’t remember which one but I can find out if you need to know.IMG_7282

Used my paint sprayer for the actual paint…Two coats.

IMG_7284

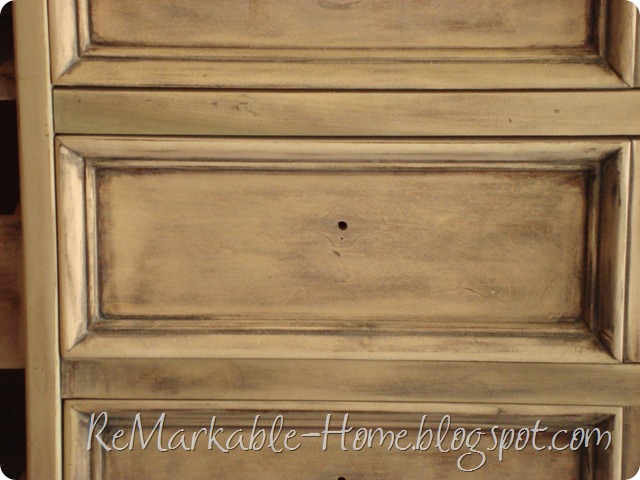
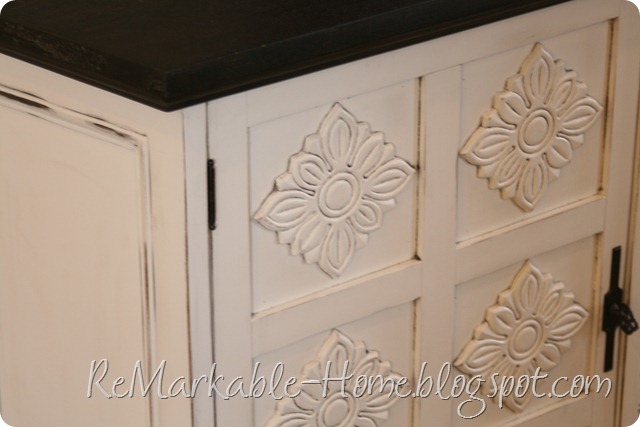
I then distressed it and did a glaze coat using some of the stain from the top mixed with glaze.  After that I finished it with a coat of Minwax paste finishing wax.

The hardware is all the original hardware.  One of the hinges and one of the pulls on the doors were bent.  I used a hammer and placed them on the concrete driveway and hammered them back in shape.  I sprayed them with a Rustoleum oil rubbed bronze finish.  I love them! 

IMG_7970

IMG_7965

It is absolutely perfect in my loft.  We have all our movies inside, as well as our family home evening materials, and the DVD and VCR players.  I am really happy with how it turned out!

4.06.2012

My House, continued- The Loft

Let’s see, I guess we will move upstairs.  There is one room down stairs I didn’t get photographed yet.  It’s my son’s bedroom and he hadn’t made his bed yet when I was doing the photographing.  Hopefully I will get it done later.

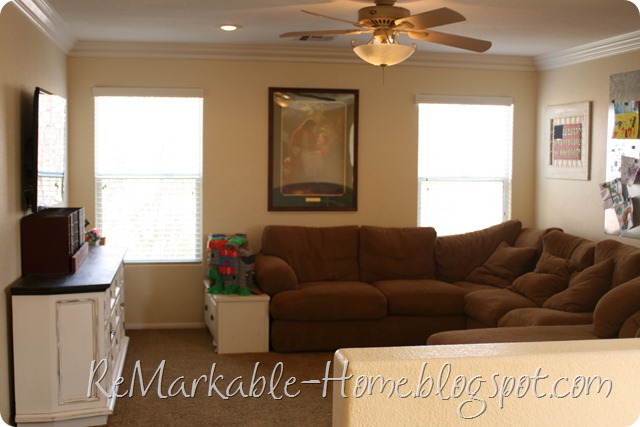
At the top of the stairs we have a loft area.  This room has been changed around numerous times to try to accommodate different furniture.  For years we had a green plaid camel back sofa that I got when my first son was born.  It was a very good couch that held up extremely well.  It has recently been moved to my mom’s basement where my oldest son will be living, in fact right back into the spot where it lived when I first got it!  He was nursed as a baby on that couch and now he will be using it as a college student.  Probably not sentimental to a 17 year old boy, but it is to me.

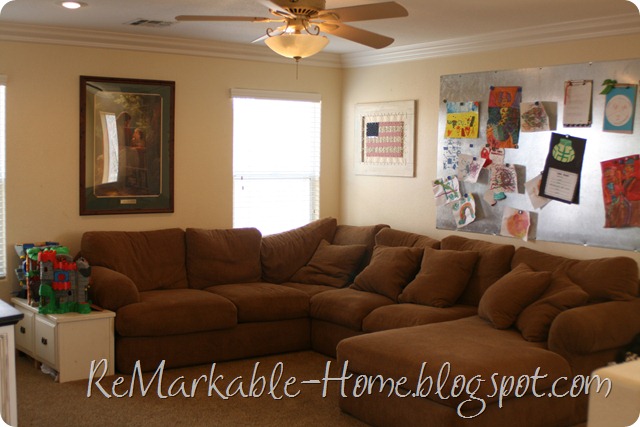
This room is where we keep toys and the kids hang out.  We recently got this big comfy sectional from a friend.  It is great for our whole family to sit on together so we had to get a new TV for us to all watch movies together up here.  We have really been loving having this space for family time.

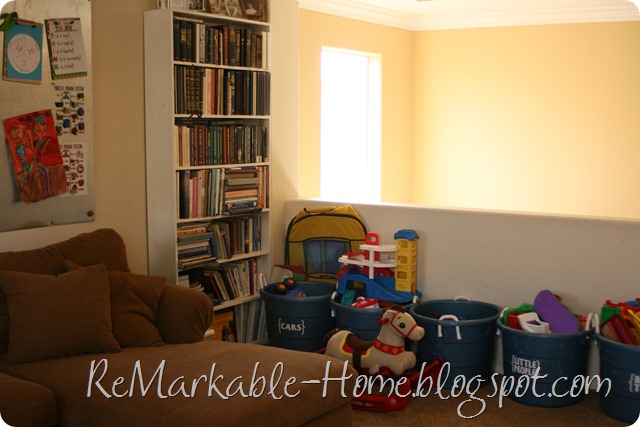
Before we got this sofa we had the other one centered on this wall under that big magnet board, with a bookcase on either side.  The kids display their artwork on the magnet board.  I meant to frame it out with molding but never got it done.  It looks pretty sloppy all the time, but at least the kids have somewhere to display their work.

IMG_7964

Remember the big buffet I got that someone had put out for the trash?  Well, here it is all refinished.  I haven’t gotten around to writing a post about it but I will soon.  It is the perfect piece for this room and stores all our movies as well as a DVD player and VCR.  I just love it!

Those are all our photo albums.  Don’t worry.  I am not up to date at all on those.  I think I got all my pictures into them up until I got a digital camera in 2009 or so.  But they pictures are just stuck in and I need to go back and journal about them.  Pictures are my nemesis!!! They stress me out soooo bad. 

That sign sitting in front of the albums used to be downstairs but I wanted to bring it up here.  It is supposed to be hanging up above the TV but we haven’t gotten around to that either.

IMG_7965

Behind this half wall are 5 huge toy bins full of toys.  We have way to many toys, but I have a hard time getting rid of them!  Soon I should be able to get rid of all the babyish toys, which makes me happy and sad at the same time.

IMG_7973

IMG_7985

I chose this cream paint color for up here because downstairs used to be so colorful that I just needed to be able to get away from the color.  I do love off-white though.  I like this room because it is always very light and bright.  And sunshine makes me happy.

If I had unlimited funds and ample time all the rooms in my house would be very different.  I used to spend a lot of time thinking about and decorating my house.  But then I got more kids…a lot more kids!  And I have since decided that having a perfectly decorated house is just not that important in the grand scheme of things.

Do you have a good space for your family to relax together?  If not, get one.  It has made a big difference in our home!

4.05.2012

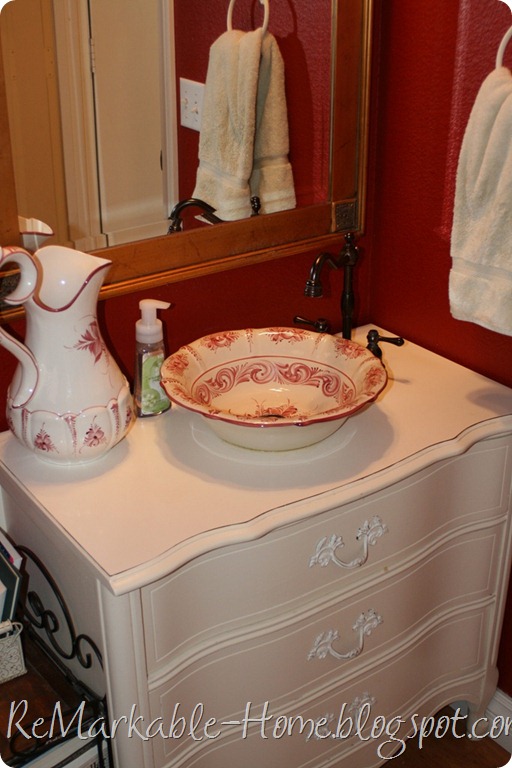
My House, continued- The powder room

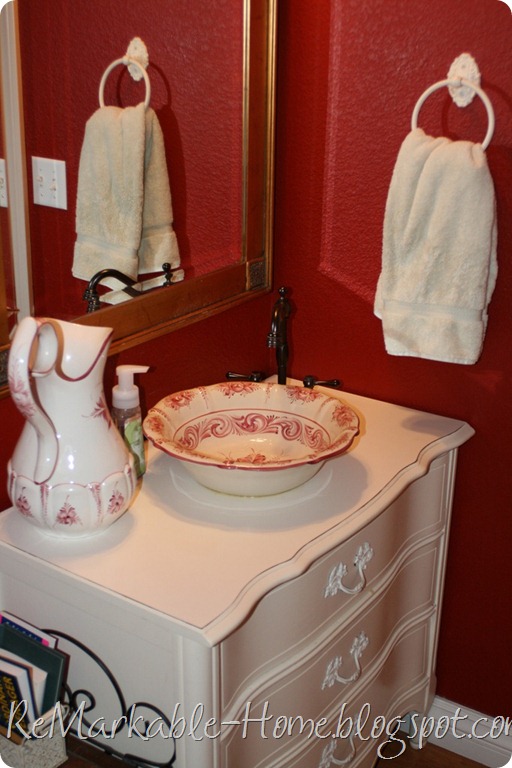
Next up is my powder room.  Boy oh boy has this room been a pain in my neck.  When we were first painting this house, my husband broke the pedestal sink.  I knew that I wanted to turn a dresser into a vanity and have an above counter sink.  But I think we lived with no sink in here for 3 or 4 years, maybe longer.  I finally got my hands on an Ebay dresser that was the right size and style.  I had to refinish it because the paint job on it was SUPER shabby Chic.  I found a bowl I loved at Home Goods and had my dad drill out a hole for the drain with his dental drill.  I found a faucet I could afford on Ebay.  Then it took quite awhile before I could get it all assembled.  My younger sister who is good at wood working helped me to alter the drawers to accommodate the plumbing.  I hired a company to come and put it all together.  They did a good job except they caulked around the bottom of the bowl with some ugly caulk.  I hurried and got it off and recaulked it. 

IMG_8002IMG_8003IMG_8005

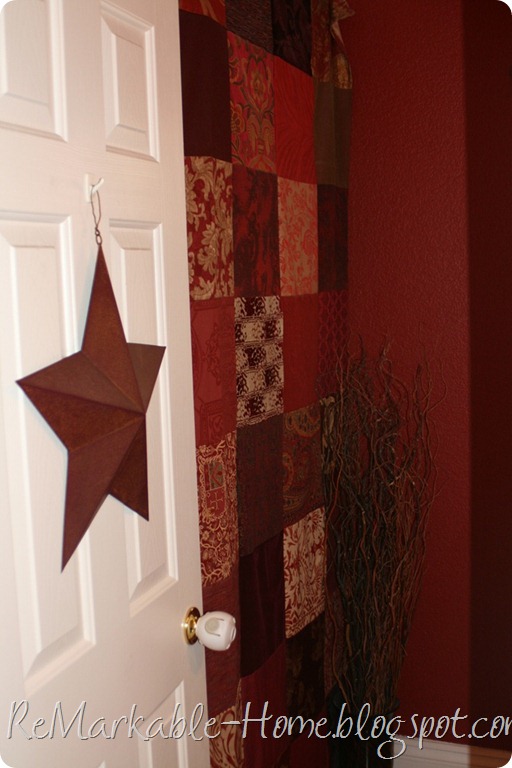
Hanging on this wall is a quilt top made from decorator fabric samples.  I got boxes of these samples from the job I had before I was married.  I cut them all into 12x12 squares and asked friends and family to sew them all together.  We used them as blankets at the picnic we had after my wedding in the St. George temple.  It looked gorgeous!  I love this red one, especially because I love red and am unable to wear it with my red hair and complexion.  I intended to actually up0holster this wall with this quilt top, but alas, it is still hanging up with the thumb tacks we stuck it up there with 11 years ago!  The wall behind it isn’t even painted, except it says “HI” with a smiley face in red paint, compliments of my husband!

IMG_8006

4.04.2012

My House, continued- The Family Room

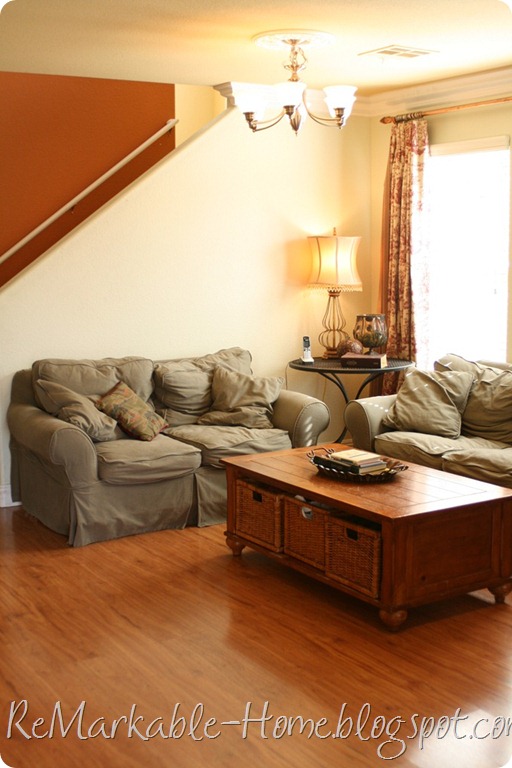
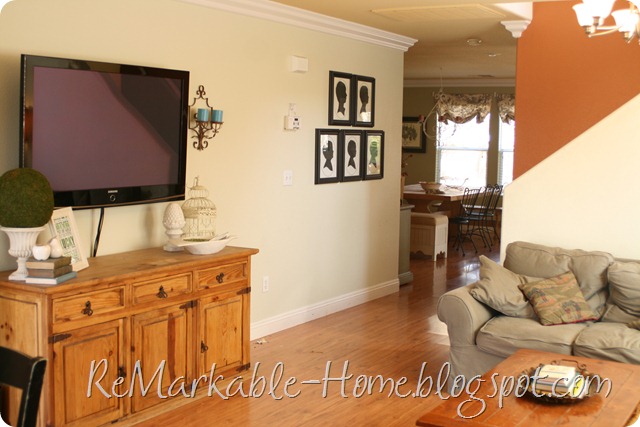
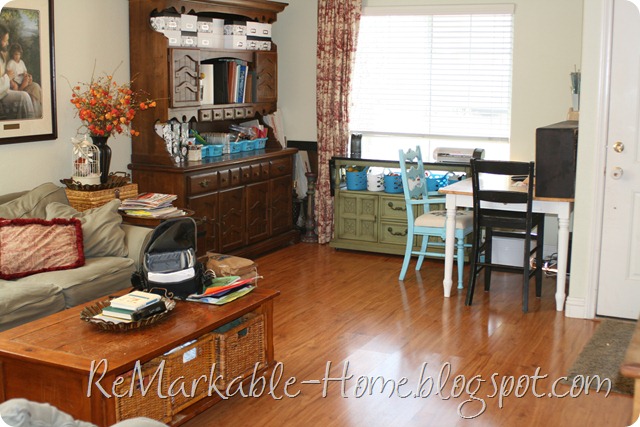
Ok, next up is my little family room/ craft room.  I don’t love this space.  I dislike how you come into my house and it’s the family room.  But it had to be done.  I hate my couches!  I’ve wanted to replace them for a long time.  But my kids have been pretty hard on furniture and I was worried about how I would react if I got new couches and then my kids ruined them.  So, we still have these ones.  They are ok.  I am just tired of them.  They are slipcovered and if I had more time and money I would attempt to make new slipcovers for them.  But I have neither.  The coffee table needs a facelift.  It will actually be going to live with my son who is starting college in the fall.

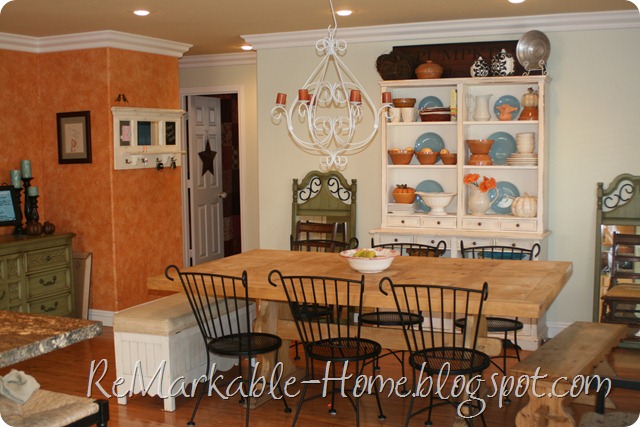
The chandelier used to hang down to table height and we had a dining table there.  We tied it up with a zip tie when we changed things around and its been that way ever since!

The drapes were made by me and the curtain rods are made from copper pipes with amber light bulb finials. 

This room used to be painted in dark fall colors.  It was fun for awhile, but when we started using this room more I got tired of the dark colors and we repainted it this light green.  That orange wall on the stairs needs to be repainted, but again, haven’t gotten to it yet!

IMG_7994

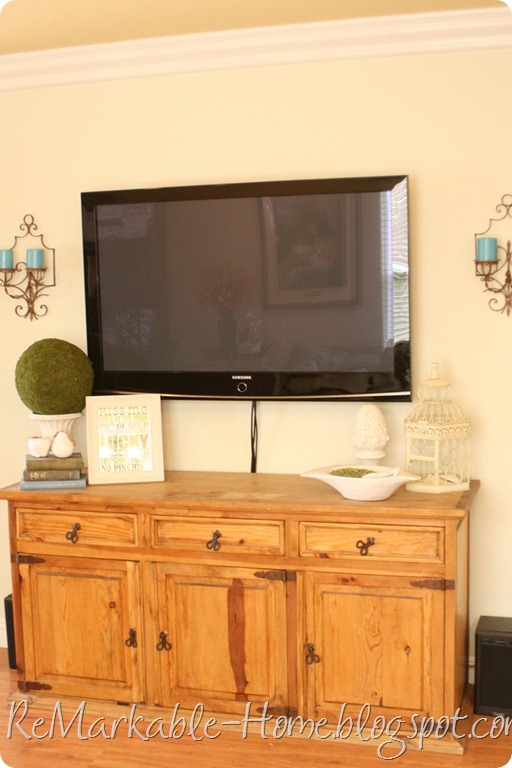
I’ve had this buffet here for a long time.  It used to have a large mirror over it and was a nicer entry.  But we had to have a TV when we changed this to our family room.  So the mirror went upstairs to my bedroom and the flat screen went on the wall.

IMG_7995IMG_7997

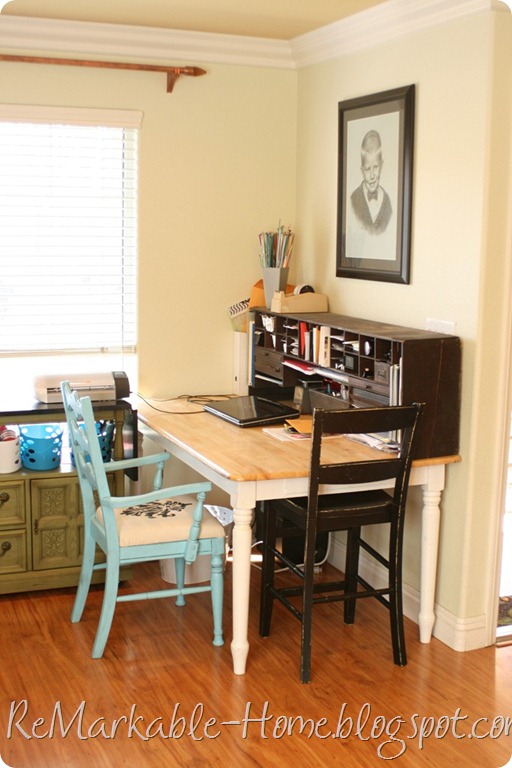
Here you can see my craft space.  I do love this space.  It is very useful and helps me contain most of my crafting messes to this space, rather than spreading them all over the kitchen like I used to do.  Here you can see the green buffet that I got with the dresser in the kitchen.  I had originally planned to cut the top off and make an upholstered seat to put on it like a window seat.  But the two layers of surfaces were so useful I kept them as they are.

I got the huge buffet and hutch from a guy on Craigslist for $40.  His grandma had passed away and he needed to get rid of it.  He seemed happy to see it go to someone who would really love it.  I had planned to paint all this furniture off white so it would all match, but it hasn’t gotten done yet!

The little hutch on my desk came from an antique store.  It is so great!  It must have been a mail sorter’s hutch or something because it has all little cubbies and drawers.  It is just perfect for all my office supplies.  And I love having something that is so old and been around for so long.  It was a great find!

IMG_8015

IMG_8000

Our floor was laid by my husband with the help of his dad about 8 years ago.  It is laminate.  It has been a great floor for our family. 

IMG_8015

Here is one more view of my kitchen I forgot yesterday:

IMG_8013

Related Posts Plugin for WordPress, Blogger...
 
Blogging tips